
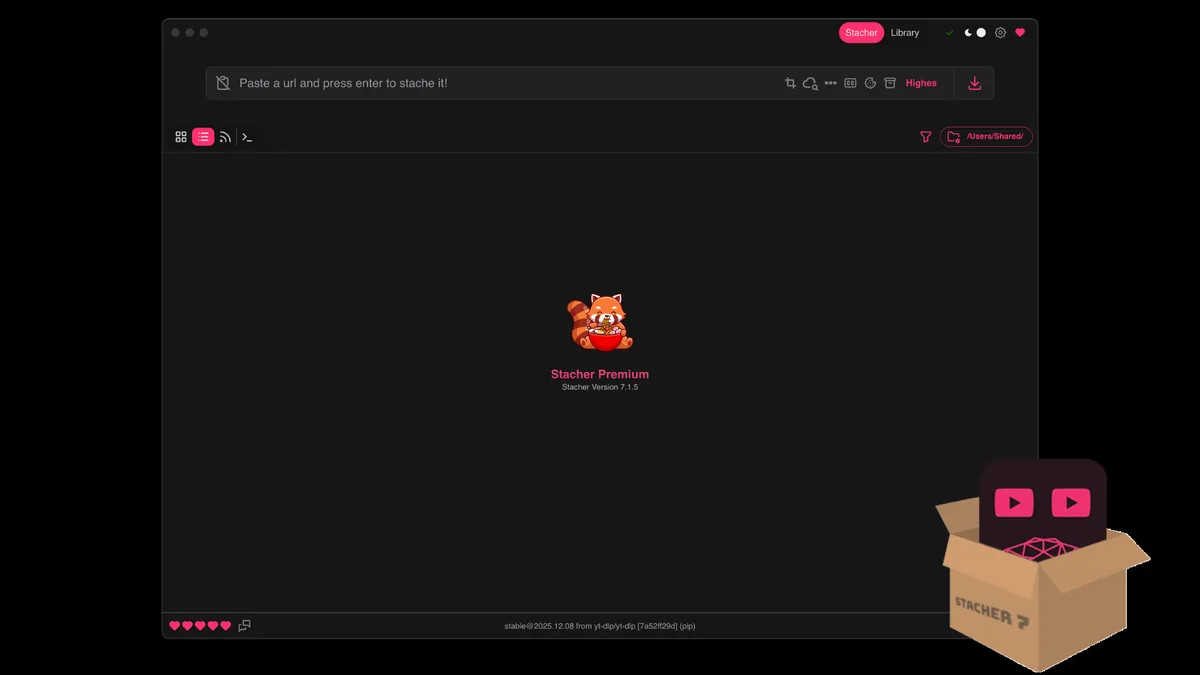
Install Stacher and confirm the first launch
Download Stacher from the platform buttons on the homepage or from stacher.io. Windows users should choose the x64 setup file. Mac users need either the Apple silicon DMG for M-series chips or the Intel x64 DMG. Debian-based Linux users can use the amd64 package. Avoid unofficial repacks because they can be stale, modified or incorrectly flagged by security software.
Open the installer and follow the operating-system prompts. On macOS, move the application as directed and use the normal system security flow if Gatekeeper asks you to confirm the source. On Windows, check that the filename matches the current release before approving an installer prompt. Stacher may download or manage supporting components after the first launch.
- Launch Stacher and wait for its initial update checks to finish.
- Open Settings and confirm that the yt-dlp component is present and current.
- Install or configure FFmpeg when you plan to merge separate video and audio streams or convert audio formats.
- Restart Stacher once after component updates if the interface asks you to do so.
Stacher is a graphical front end. Source-site support and extraction behavior are largely provided by yt-dlp, so updating that component is often more important than reinstalling the entire interface.
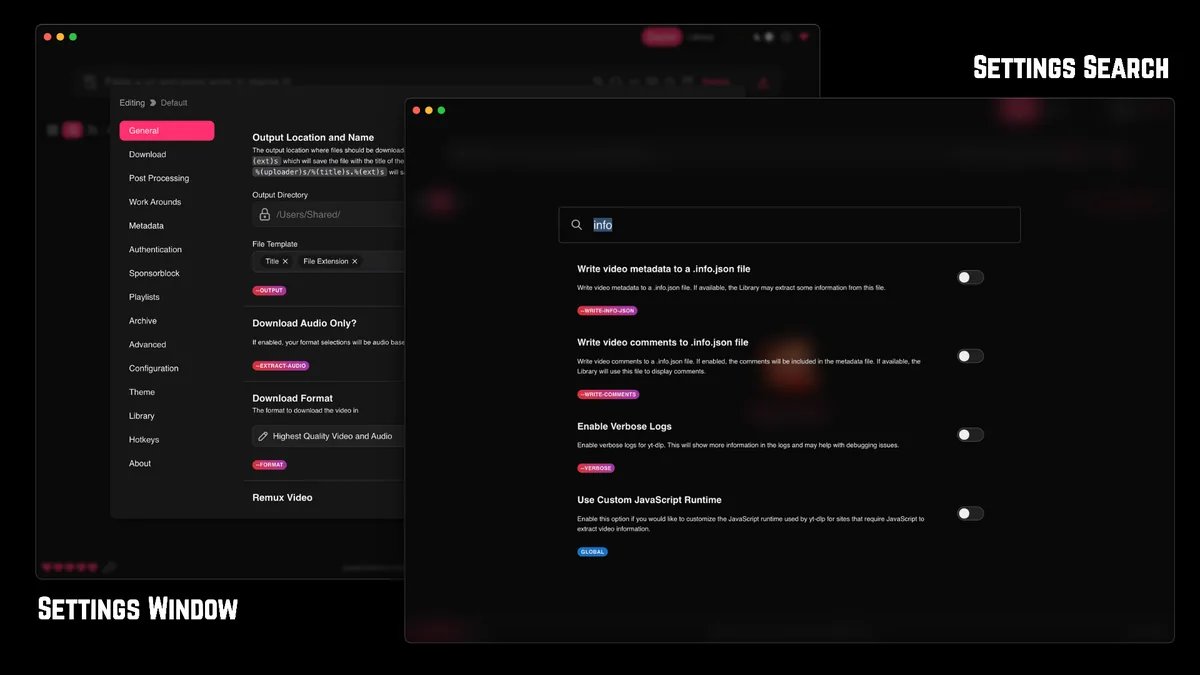
How to use Stacher for your first download
Start with one public URL for media you own, created or are authorized to save. A simple test makes troubleshooting much easier than starting with a private page, a long playlist or a live stream. Copy the page URL from your browser, paste it into Stacher's URL field and wait for the app to recognize it.
Choose a combined video-and-audio preset for the first test. Highest Quality may select separate streams that require FFmpeg, so a compatibility-oriented preset can be a better diagnostic choice. Confirm the output directory, then use the download control. The job should move from queued or waiting into an active progress state before post-processing begins.
- Create or choose an output folder with enough free disk space.
- Paste one complete media URL into the input field.
- Select a video-and-audio preset or enable audio-only mode when that is your actual goal.
- Start the download and watch the status line rather than submitting the same URL repeatedly.
- Open the output folder from Stacher after the job reports completion.
Downloading a file does not grant rights to reuse it. Follow the source platform's terms and only save material you are permitted to download.
Set the output folder, name and format
The output directory determines where completed media is written. Choose a normal user folder rather than a protected system directory. If Stacher finishes but you cannot find the file, check the exact path shown in the job and search for the final filename rather than the original page title.
File templates control naming. Keep the default title and extension fields until downloads work reliably. Adding uploader, playlist or date fields can help later, but a complex template can produce long filenames or nested folders. The format selector controls requested streams; it cannot create a resolution, frame rate, codec or language that the source does not provide.
- Use MP3 when broad playback compatibility is more important than avoiding conversion.
- Use M4A or Opus when the source already supplies that audio and you want to avoid another lossy encode.
- Use H.264-compatible selections when older editors, televisions or presentation software reject VP9 or AV1.
- Enable subtitles or metadata only when the source exposes them and you actually need the extra files.
A container such as MP4 or WebM is not the same as a codec. Compatibility depends on the codec inside the file as well as the extension.
Check the result before downloading a batch
Play the first completed file from beginning to end or at several points. Confirm that video, audio language, subtitles, duration and frame rate match what you intended. If Stacher downloaded separate temporary streams, confirm that post-processing finished and that the final merged file is present before deleting anything.
Once one URL works, save the preset or repeat the same settings with a short playlist. Add archive behavior only after understanding it: an archive can prevent duplicate downloads, but it can also make a repeated test appear to do nothing because the media ID is already recorded.
- Check the final duration and file size.
- Listen for the correct audio track and language.
- Confirm subtitles are embedded or saved separately as expected.
- Keep enough free space for temporary video, audio and merged output files.
- Review the log when a job stops at extraction, download or post-processing.
If the first public test fails, update yt-dlp and read the log before adding cookies, proxies, custom arguments or post-download scripts.
How to use Stacher as a repeatable workflow
After the first successful file, make one change at a time. Start by deciding the required result: a broadly compatible MP4, the best source quality, an audio-only file or a playlist collection. Duplicate or save the working preset before changing format rules. A known-good preset gives you a control case when a future URL behaves differently.
For each new source, check the URL in a browser and confirm that it is public or available through your legitimate account. Paste the complete page URL, keep the output path visible and watch the job move through extraction, transfer and post-processing. Those stages explain most status messages. Extraction discovers streams, transfer writes media data and post-processing merges or converts the result.
Use Stacher settings only to request media the source actually exposes. If a resolution, subtitle language or audio track is absent, changing the container will not create it. When a request fails, return to the working preset and compare the format list or log. This establishes whether the problem is the source, a requested stream or a local component.
Finish by opening the file in the application that will actually use it. A video can play in one modern browser but fail in an older editor because of its codec. Record the preset, output folder and any required FFmpeg step before applying the workflow to a larger batch.
- Keep one unchanged compatibility preset for diagnostic tests.
- Change format, subtitles, authentication or naming separately.
- Save the useful log lines with the source URL and test time.
- Verify the final deliverable before deleting temporary or source files.
Learning how to use Stacher reliably means preserving a working baseline and testing each advanced choice against a real output requirement.
How to use Stacher FAQ
Do I need yt-dlp to use Stacher?
Yes. Stacher is a GUI built around yt-dlp behavior. Stacher can manage the component for you, but keeping it current is essential when supported websites change.
Do I need FFmpeg?
You need FFmpeg for common tasks such as merging separate video and audio streams, extracting MP3 audio and some remux or conversion operations. A basic single-file format may not require it.
Where does Stacher save downloads?
It saves files to the output directory shown in Settings or the active job configuration. Check that path and the naming template if the finished file is hard to locate.
Can Stacher download one video at a time?
Yes. Paste one URL and start one job. This is the best way to confirm the installation and preset before using playlists or batches.
Why does Highest Quality create more than one temporary file?
Many sites deliver the best video and best audio as separate streams. Stacher downloads both and uses FFmpeg to merge them into the final file.